Implementation of a Scalable Web Application using the services of AWS Elastic Beanstalk, DynamoDB, CloudFront, and Edge Location
Project description:
In this project based on a real-world scenario, I was responsible for implementing an application that needs to support the high demand of a large number of users accessing it simultaneously.
This application has been used in a large conference that had more than 10,000 people, in-person and online, with participants from all over the world.
This event was broadcast online and in person and 10 vouchers were drawn for 3 Cloud certifications. At that moment, more than 10,000 people in the audience registered their e-mails to guarantee their participation in the raffle.
I used AWS Elastic Beanstalk services to deploy the web application, DynamoDB to store emails, CloudFront to cache static and dynamic files in an Edge Location close to the user.

Solution Architecture:

We will start implementing this project by dividing it into three parts
Part 1: Create a table in DynamoDB to store users email addresses and create an Elastic Beanstalk to provision all the necessary infrastructures such as EC2, Elastic Load Balancer and Auto Scaling group
Part 2: Create a CloudFront distribution
Part 3: Perform Load testing on the application
Lets get started!
Part 1: Create a Dynamo DB to store user email address
Amazon DynamoDB is a fully managed NoSQL database service that provides fast and predictable performance with seamless scalability.
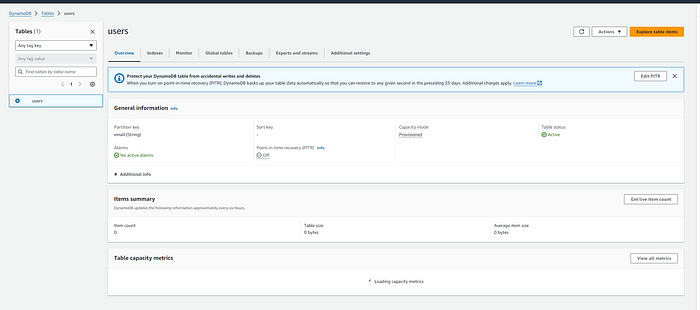
Search for DynamoDB in the AWS console and click to select it. This service will be used to store users email address
Table name: users
Partition key: email
Leave everything else as default and click Create table at the bottom right


Create an Elastic Beanstalk
With this service, the web application can be deployed and managed in the AWS Cloud without requiring concern for its supporting infrastructure. We will upload the application files and it will automatically handle the details of capacity provisioning, load balancing, scaling, and application health monitoring.
Search for elastic beanstalk in the AWS console and click to select it.
Select “Create Application” and enter the information below
Application name: tcb-conference
Platform (runtime environ.): Python 3.7+
Application code: Upload the application file code -> The Public S3 URL is provided below


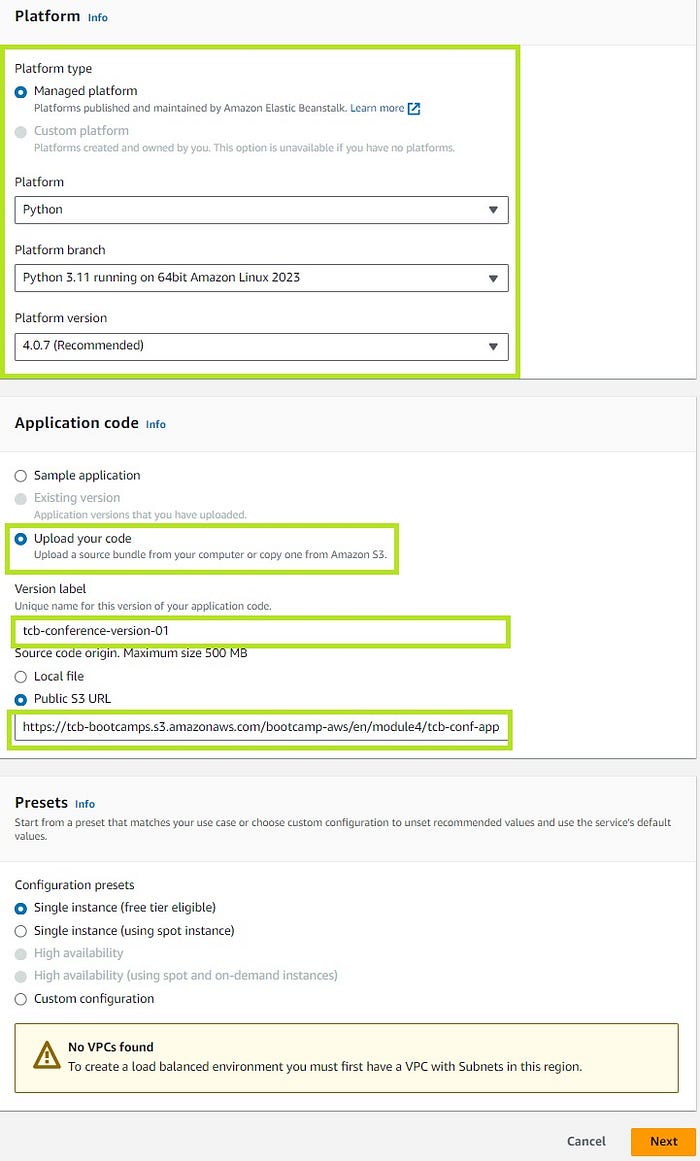
I can’t select (High availability) . I solve it,
Deleted my all VPC from previous module, I need to have a VPC with subnets for most of the modules moving forward. No VPC , No Subnets, No chances of creating multiple instances with High availability.
Note: aws ec2 create-default-vpc on the aws cloudshell it will create default vpc


b. Step 2: Configure Service Access — Under this configuration step, we need 2 service roles viz., “service” and “ec2” each with different policies and permissions based on the intended Elastic Beanstalk web server environment and the created DynamoDB table. These 2 IAM roles, assumed by Elastic Beanstalk as a service role, and EC2 instance profiles allow Elastic Beanstalk to create and manage the environment. I attached both the IAM role and instance profile to IAM managed policies that contains the required permissions.
For creating the Service role, I chose Create and use new Service role option and provided the Service role name as aws-elasticbeanstalk-service-role. See the below snapshot capturing the same –
The next step is to create a EC2 key pair that will be used to securely connect and log in to my EC2 instance. I created a SSH key pair viz., mod4-ssh-key.

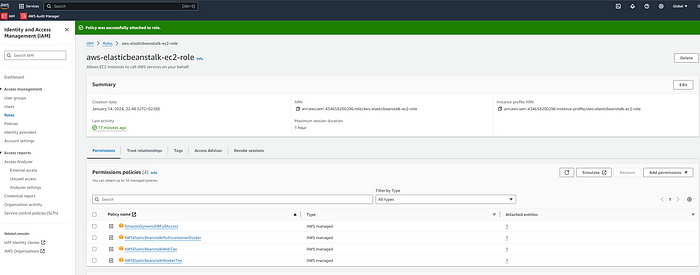
The last step under this section is to create an EC2 instance profile. To accomplish this, I used the IAM service and under Roles chose AWS Service as Trusted Entity type and picked EC2 as the Use Case. Assigned the following Permissions and attached them as Policies under Add Permissions:
— AWSElasticBeanstalkWebTier
— AWSElasticBeanstalkWorkerTier
— AWSElasticBeanstalkMulticontainerDocker


On the next screen, provided the role name as aws-elasticbeanstalk-ec2-role and reviewed the trusted entities and add permission to finally create the IAM role.


EC2 instance profile created

c. Step 3: Setup Networking, database and tags — This is the step where we need to setup the VPC as well the Instance settings. I picked up the default VPC and associated the Public IP Address under Instance Settings to the EC2 instances as we need to access it over the internet.


d. Step 4: Configure Instance traffic and scaling — This is the step where I configured the traffic and auto scaling settings for the Amazon EC2 instances that run the application. Apart from configuring everything under this section, the one’s worth pointing out is configuring the auto-scaling (dynamic scaling) group to use two (2) desired / minimum ec2 instances and four (4) maximum ec2 instances based on the CPU utilization threshold metric. Also configured the Load Balancer to enable routing the incoming network traffic uniformly to my application across all healthy and available running servers. Given the possibility of an overloaded network traffic to the application servers with the huge amount of users, it was vital to optimize the application to run steadily and be available at all times even if one server was down. The below screenshots captures everything I did under this section –


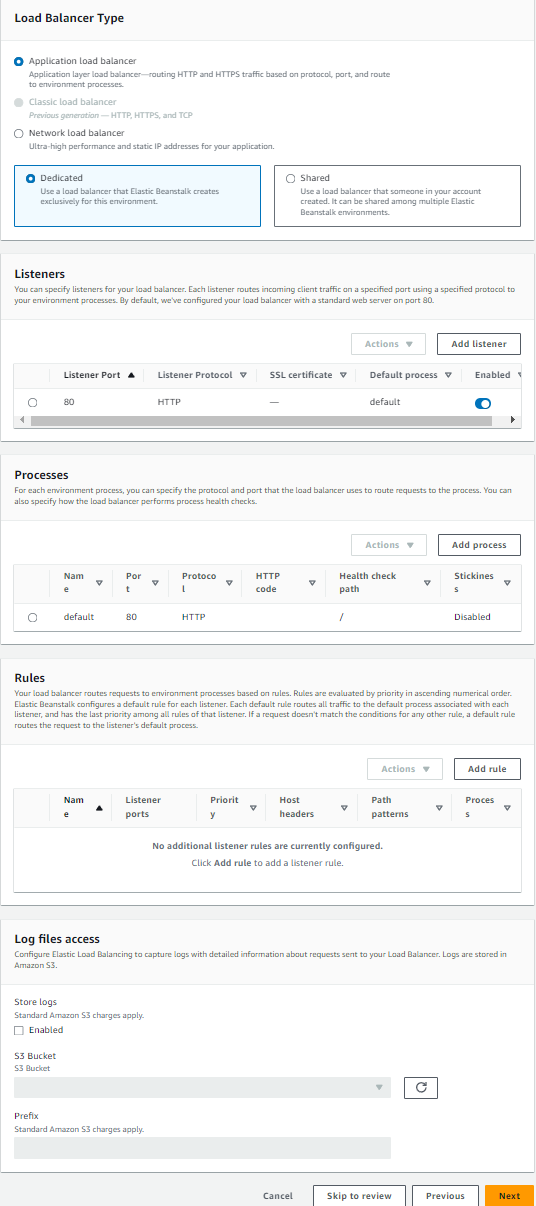
Note: The web server environment implementation of the ec2 instance will assign port 80 by default to route any network traffic to application. So, it is important to use a different traffic port if you intend not to use the default port 80 to route your application network traffic.
e. Step 5: Configure updates, monitoring and logging — Lastly, I configured the CloudWatch service that will help me monitor and observe all resources running in the web server environment and notify me via email if any undesired event were to happen and added a new environment variable AWS_REGION under Environment Properties to enable the application to be deployed under the provided Region, in my case it is North Virginia (us-east-1).


f. Step 6: Review — Reviewed everything that I did in the previous steps.

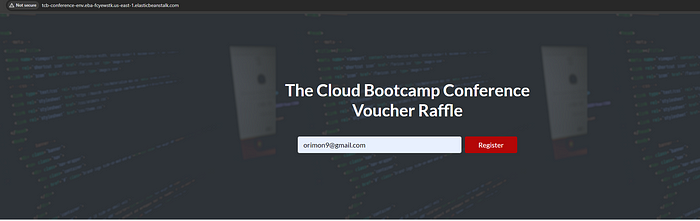
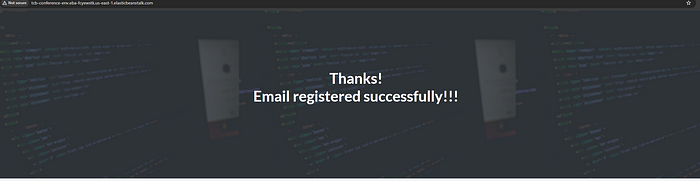
Click to link and check:
Tcb-conference-env.eba-fcyewstk.us-east-1.elasticbeanstalk.com

3. Setting up AWS CloudFront — Created a CloudFront distribution which is a fast Content Delivery Network (CDN) service to securely deliver the cached static/dynamic web content to users globally with low latency and high transfer speeds to meet yet another NFR. Some of the key configuration highlights –
a. Origin Name: Provided the origin’s domain name from the drop down. The Origin is basically the source of the application that we want the CloudFront to cache to enable caching the dynamic and static content of the application. In this case it is coming from the Load Balancer which is awseb — AWSEB-SJPSAF7uqoo7–1959173923.us-east-1.elb.amazonaws.com
b. Protocol: HTTP only

c. Allowed HTTP methods: GET, HEAD, OPTIONS, PUT, POST, PATCH, DELETE. Since the application will post the data, an email address in this case in the Dynamo DB table, POST is required.
d. Cache key and origin requests: Caching Optimized
e. Web Application Firewall (WAF): Enable Security Protection


f. Settings: Use all Edge locations (best performance). As the users are scattered all over the Globe and can connect from anywhere.
g. The created distribution which uses AWS Route 53 service was configured to point to the configured load balancer within the tcb-conference web server environment and act as a web front for the web application.
h. Post creating the distribution, a distribution domain name is created that we can use to access the application that is prompted by the CloudFront. In my case, it is https://d3uygmf7wmsp7t.cloudfront.net to access the Python application over the internet.

i. As a final step, used the newly created distribution domain name from the CloudFront distribution to access the running web application service and perform some live test as shown below.


4. Stress Test/ Overloading test: Post successfully testing the application end to end in the previous steps, the last piece that remained to validate is the Auto scaling feature that I enabled in case there is a breach in CPU utilization going over 50%, in which case a new instance will spin up automatically. For this, I performed some test case scenarios by using a Linux work load generator system tool called stress , to see how tcb-conference my web server environment will react based on a possible high network traffic. The below screen grabs from the Terminal captures the sequence of events:


sudo yum install stress -y

stress -c 4


The CPU utilization of the ec2 instance was found to have maxed out to 100% capacity, affecting the health of the application server in the tcb-conference-env environment.


This eventually forced the auto-scaling group in the tcb-conference web server environment to spin up a new ec2 instance based on the configured dynamic scaling to balance the overall shared resources used in the environment.


Anyone participating from anywhere in the world would be able to access the application service and win a voucher for a Cloud certification thanks to this dependable and scalable web application.
This project overall shows the powerful use of AWS to automate a large scalable project implementation with no human dependency and with the possibility to support high scale traffic within few minutes.
